How to Schedule EasyEcom Reports on Your Email Using 'Report Subscription'
Software Plan : Growth
Account Type : Seller Account & 3PL
Inventory Type : Serialized & Non-Serialized
Overview
Report Subscription Settings lets you schedule supported reports to be sent to one or more email addresses at a selected time and frequency. You can also add, preview, enable/disable, and delete existing report schedules from the same page.
Use Cases
- Receive scheduled reports by email without manually downloading them.
- Receive reports at a selected time and frequency.
- Configure different schedules for the same report.
- Preview the schedule and the information the recipient will receive.
Workflow
Schedule a New Report
Step 1: Navigate to Settings > Other Settings
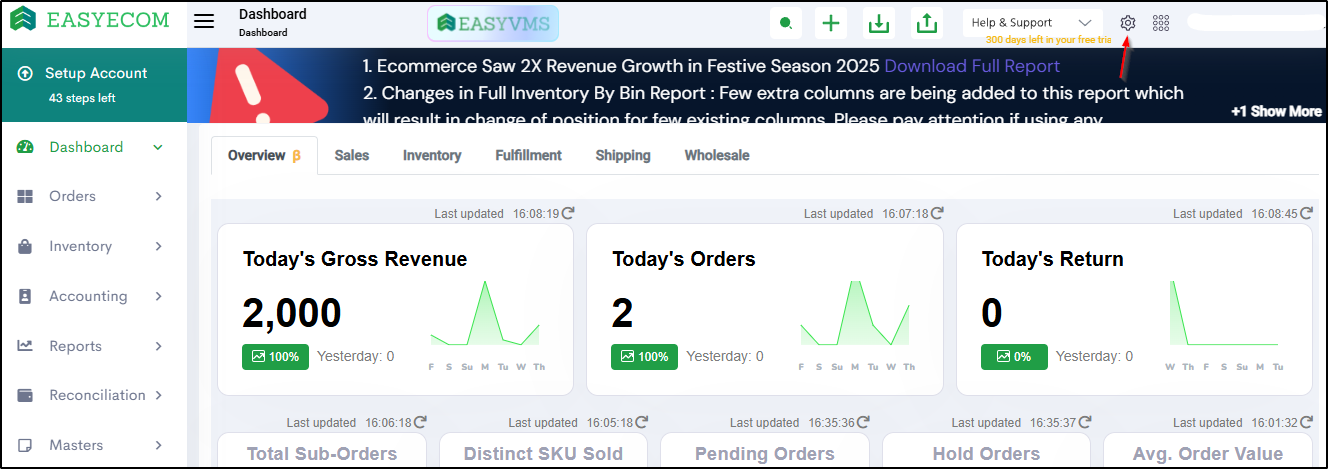
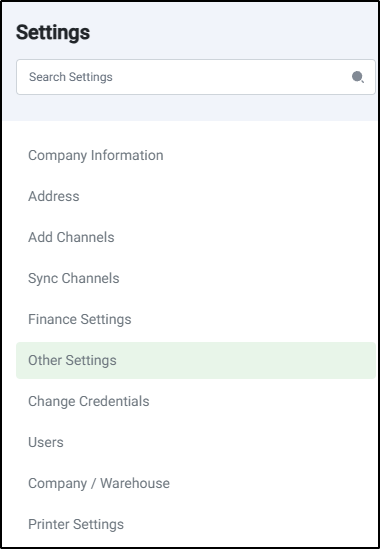
Step 2: Under Other Settings, Click on 'Report Subscription'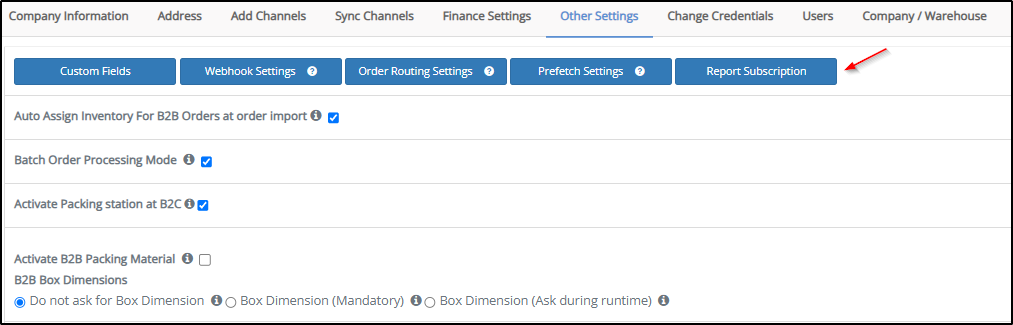
Step 3: From the Report dropdown, select the required report
How Report Scheduling Works
| What you choose | What it controls | Example |
|---|---|---|
| Report | Which report you want to schedule | Select Inventory Aging Report |
| Frequency | How often the report should be scheduled | Daily, Weekly, or Monthly |
| Day | Which day the report should be scheduled, when applicable | Monday for Weekly / 7th for Monthly |
| Time | What time the report should be scheduled | 10:00 AM |
| Email IDs | Which email address(es) should receive the report | ops@example.com or ops@example.com, manager@example.com |
| Add new frequency | Creates another schedule for the same report | Schedule the same report Daily at 10 AM and additionally Weekly on Monday at 5 PM |
Step 4: Configure the report schedule
After selecting a report, configure the schedule using the available fields.
4.1 Select Frequency
From the Frequency dropdown, select one of the following:
| Frequency | Meaning | Example |
|---|---|---|
| Daily | The report is scheduled every day at the selected time. | Select Daily → 10:00 AM and enter email ops@example.com. The report is scheduled every day at 10:00 AM. If you also want the same report on a weekly schedule, click Add new frequency and create a separate Weekly schedule. |
| Weekly | The report is scheduled once every week on the selected day and time. | Select Weekly → Monday → 10:00 AM and enter ops@example.com, manager@example.com. The report is scheduled every Monday at 10:00 AM. |
| Monthly | The report is scheduled once every month on the selected date and time. | Select Monthly → Day 7 → 10:00 AM and enter ops@example.com, manager@example.com. The report is scheduled on the 7th of every month at 10:00 AM. |
4.2 Configure the day
The day-selection field changes based on the selected frequency.
For Daily
No day-selection field is displayed.
For Weekly
A Day of Week field is displayed.
For Example: Monday
For Example: Monday
For Monthly
A Day of Month field is displayed.
Select the required date from 1 to 31.
For Example: 7
A Day of Month field is displayed.
Select the required date from 1 to 31.
For Example: 7
4.3 Select Report Period (If Available)
Depending on the selected report and frequency, the Report Period field may be displayed. When available, select the required period from the dropdown.
Weekly
- Last Week (Mon-Sun)
- Last 7 Days
Monthly
- Last Month (1st-last)
- Last 30 Days
4.4 Select Time
In the Time field, select the time at which the report should be scheduled.
4.5 Enter Email IDs
Enter the email address(es) that should receive the scheduled report in the Email IDs field.
To enter multiple email addresses, separate them with commas.
Every email address entered must meet the following conditions:
- Existing User: The email address must be registered to an existing user in the EasyEcom account.
- Active User: The user's account must be active and enabled. Email addresses associated with inactive or disabled users cannot be used.
- Location Access: The user must have access to the same location from which the report subscription is being configured. Access to other locations alone is not sufficient.
- Verified Email: The email address registered to the user must be verified.
Ensure that every recipient email address meets these requirements before saving the schedule.
4.6 Preview Schedule
Use the Preview (eye) icon to view what the recipient will receive for the selected schedule.
The What the recipient will receive preview displays:
- Report
- Sends - scheduled frequency and next run
- Date Range Covered
- Days Included
The information displayed in the preview depends on the selected report and schedule configuration.
After configuring the schedule, click Save Configuration to save the schedule.
Manage Existing Scheduled Reports
Add Another Schedule
To create another schedule for the selected report:
- Click Add new frequency.
- Configure the required frequency and schedule details.
- Enter the required email IDs.
Reset the Configuration
Click Reset Settings to reset the current schedule configuration.
Edit a Report's Schedule
- Select the Report from the Dropdown.
- Change the required schedule details.
-
Click Save Configuration.
Turn a Report's Schedule On or Off (Enable/Disable)
Use the Status toggle to turn the report schedule on or off.
Delete a Report's Schedule
- Click the Delete (✕) icon for the schedule you want to remove.
-
Confirm the deletion, if prompted.
FAQs
1. Which reports can I schedule?
The reports available for scheduling are displayed in the Report dropdown.
2. Can I create multiple schedules for the same report?
Yes. You can create multiple schedules for the same report.
3. Can I send the same report to multiple email addresses?
Yes. Enter multiple email addresses in the Email IDs field, separated by commas. Each recipient email address must independently meet the recipient requirements mentioned in Section 4.5.
4. Can I stop a scheduled report without deleting it?
Yes. Turn off the schedule using the Status toggle.
5. Can I delete a report schedule?
Yes. Click the ✕ icon for the required schedule and confirm the deletion.
6. What is the difference between Weekly report periods?
Last Week (Mon-Sun) covers the most recently completed Monday-to-Sunday week.
Last 7 Days uses a rolling seven-day period.
7. What is the difference between Monthly report periods?
Last Month (1st-last) covers the most recently completed calendar month.
Last 30 Days uses a rolling 30-day period.
8. Is Report Period available for every report?
No. The Report Period field is displayed only where applicable to the selected report and frequency.
9. Why is my recipient email ID being rejected even though it is valid?
The email address must belong to an existing, active EasyEcom user who has access to the location from which the report is being scheduled. The user's registered email address must also be verified. Check all four conditions before adding the recipient email ID.