Packing Station for B2C Order Processing
What is a Packing Station?
The packing station is a place where the products are checked and packed before shipping. The station contains all kinds of materials that are required for packing. Packing stations are sometimes customizable according to the needs of the packer.
In this guide, we have explained the process that takes place in the packing station.
Step 1: Select Account Settings from the Meatball menu.
Go to > Other settings
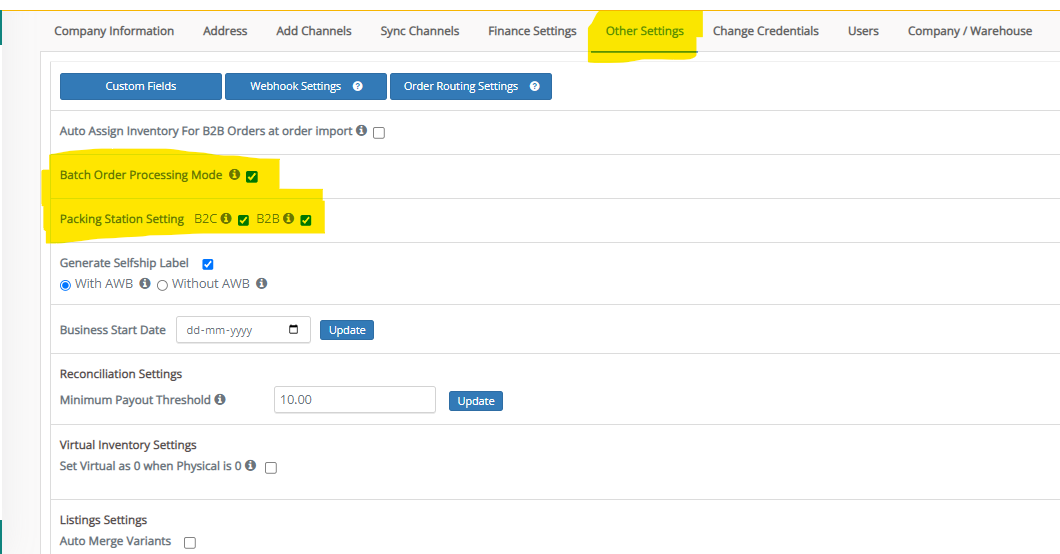
Check whether “Batch order processing mode” and “Packing station setting” for B2C are enabled. If not, please enable those.
Step 2: In the toggle menu, navigate to “Orders >> Order Batches”
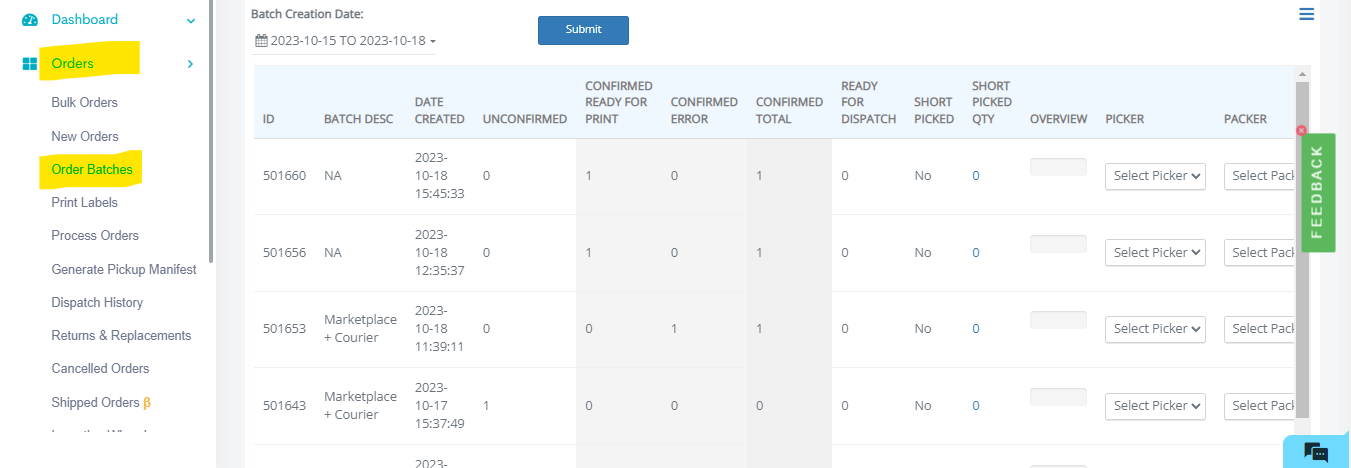
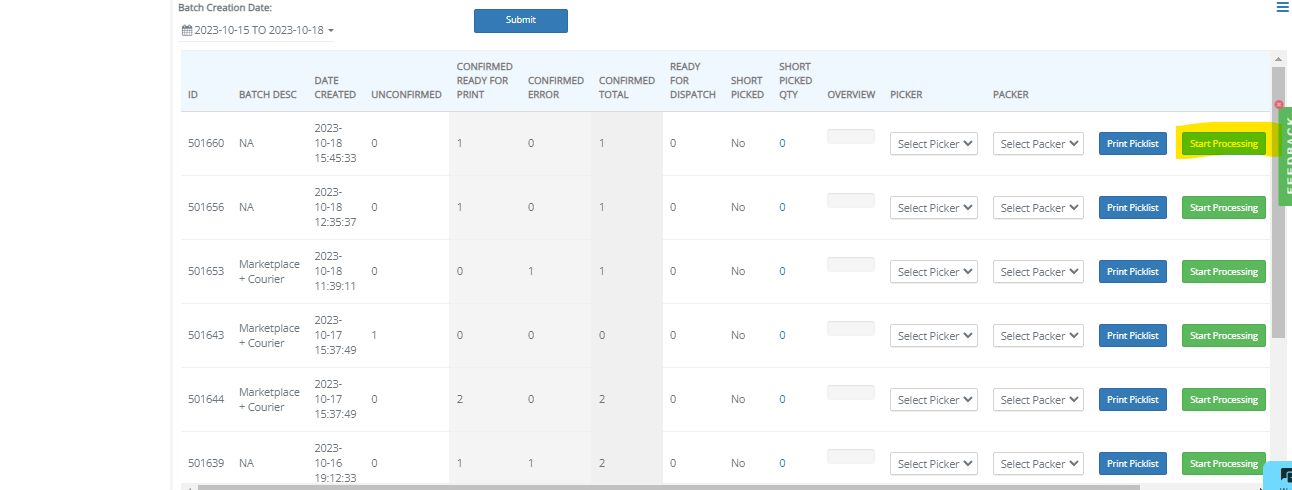
Step 3: Start processing
If the order is not created, use the hamburger menu to create a new order.
If the order is already present, click on the “Start Processing” button.
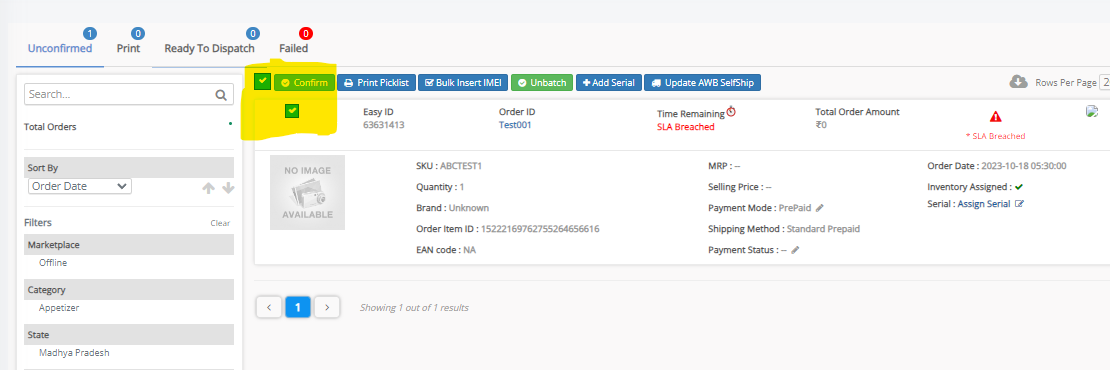
Step 4: Confirm the order
The packer should select the orders that are to be processed further and click “Confirm” to confirm the order.
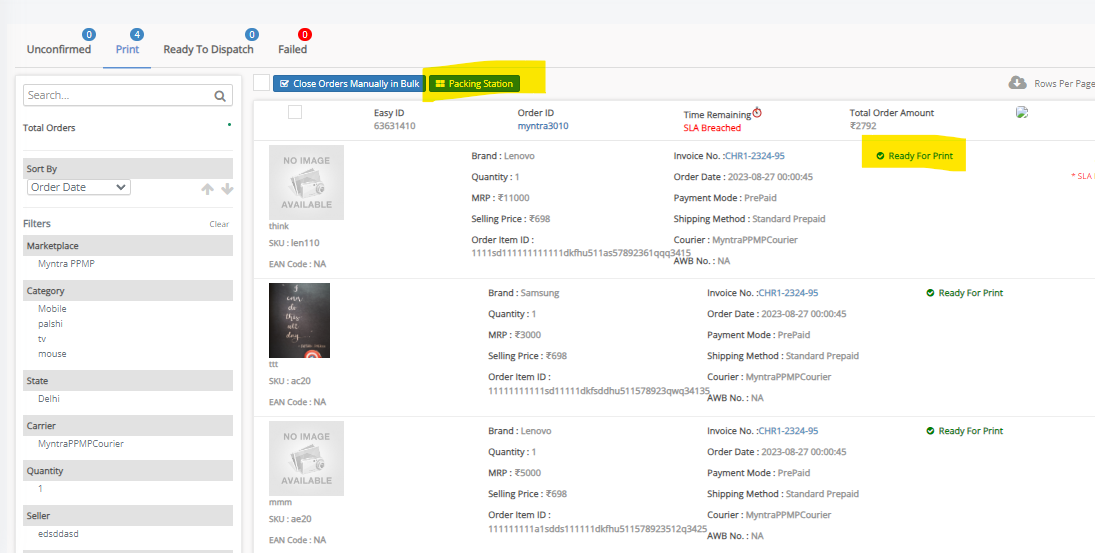
Step 5: Packing station
Once the order is “ready to print”
Click on “Packing station” from the “Print tab”.
The order should be confirmed if it is in the unconfirmed state.
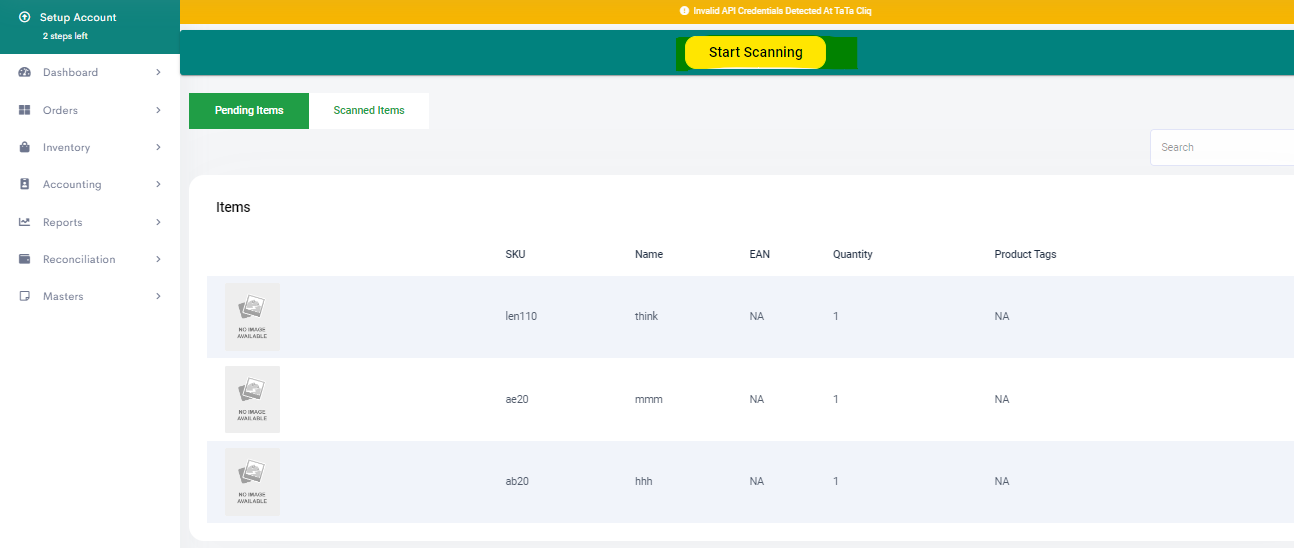
Step:6 Start Scanning
Click on the start scanning button to proceed further and start scanning the SKU/EAN/USN or Serial (if serial number setting is enabled)
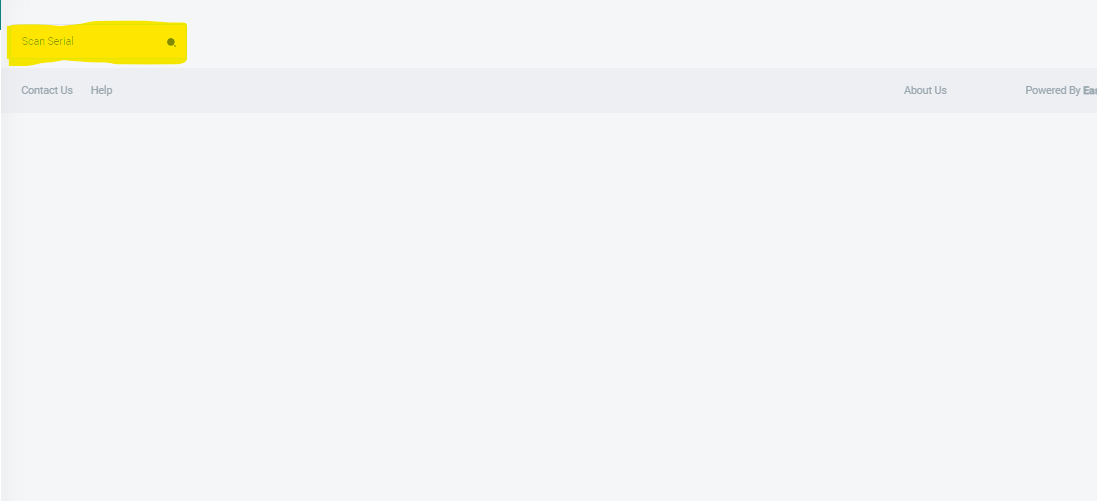
Once the SKU/EAN/USN is scanned, the following cases are there-
Case 1- NO PACKING MATERIAL, TAG LOOP, OR QC IS REQUIRED.
If no packing material, tag loop, or outbound QC is enabled, then upon scanning the item, shipping labels and Invoices will be generated directly.
CASE-2: ONLY PACKING MATERIAL IS ENABLED.
After successfully scanning all the items a pop-up appears that asks to scan/select the packing material.
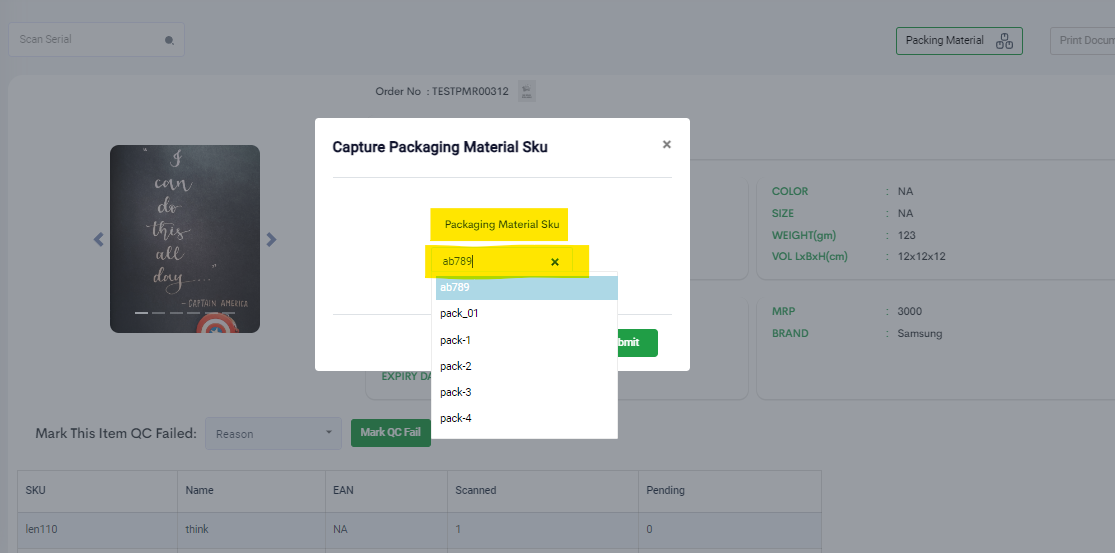
Once the packing material is captured, click on the submit button and the relevant doc like label and Invoice will be printed from the printer.
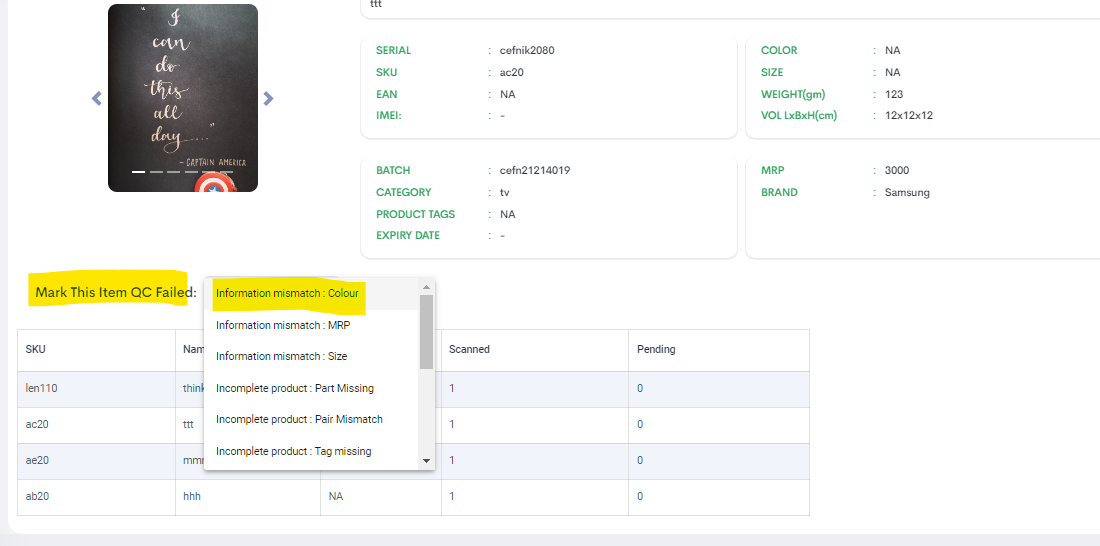
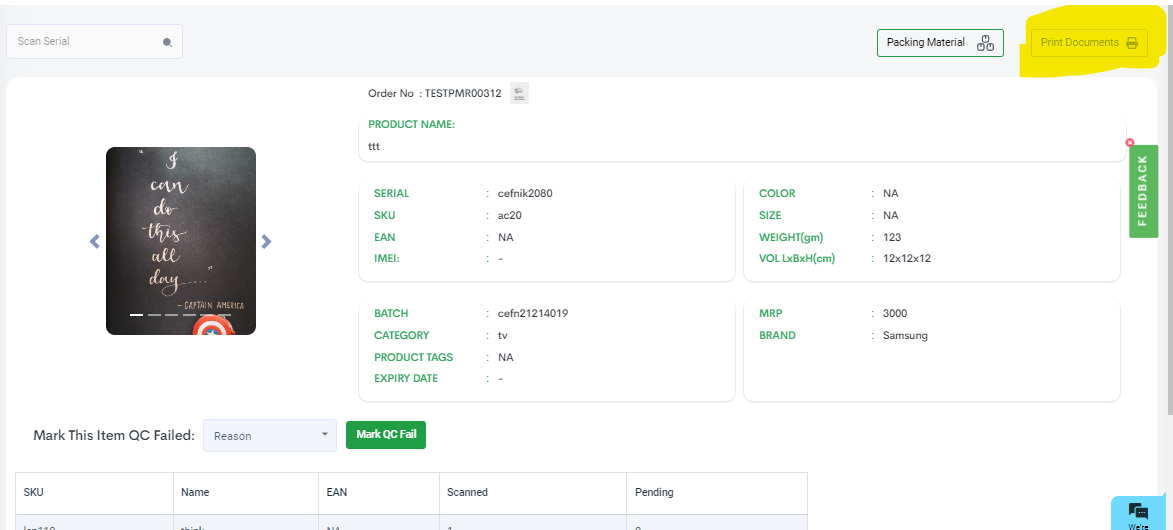
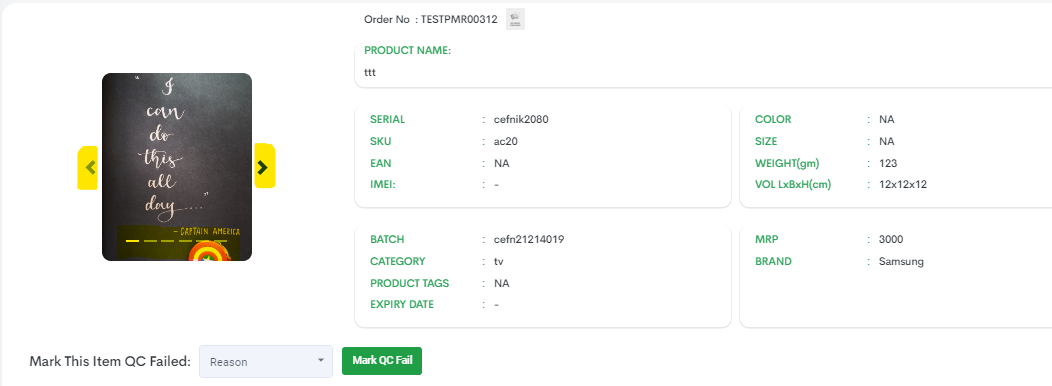
CASE-3: ONLY THE OUTBOUND QC MODULE IS ENABLED.
If your account has only the Outbound QC function enabled, then upon scanning, the details will be shown below on the same page which will populate all the details with respect to that SKU, from here two things can happen
If the Item is in good condition, then click on the Print Documents button,
labels and Invoices will be generated from the printer.
If the item is not in good condition, then select the reason from the QC failed reason list and mark it QC Fail.
Upon this action, no document will be generated for these orders and you will be taken to the previous page where a new item needs to be scanned.
CASE-4: BOTH OUTBOUND QC AND PACKING MATERIAL ARE REQUIRED.
If both Outbound QC and Packing material are enabled for your account, then after scanning you may click on the “packing material” button (If items are QC pass) and the relevant document will be printed from the printer directly.


If on capturing the packing material, the item is marked as QC failed then it will be redirected to the scan item page without printing the documents.
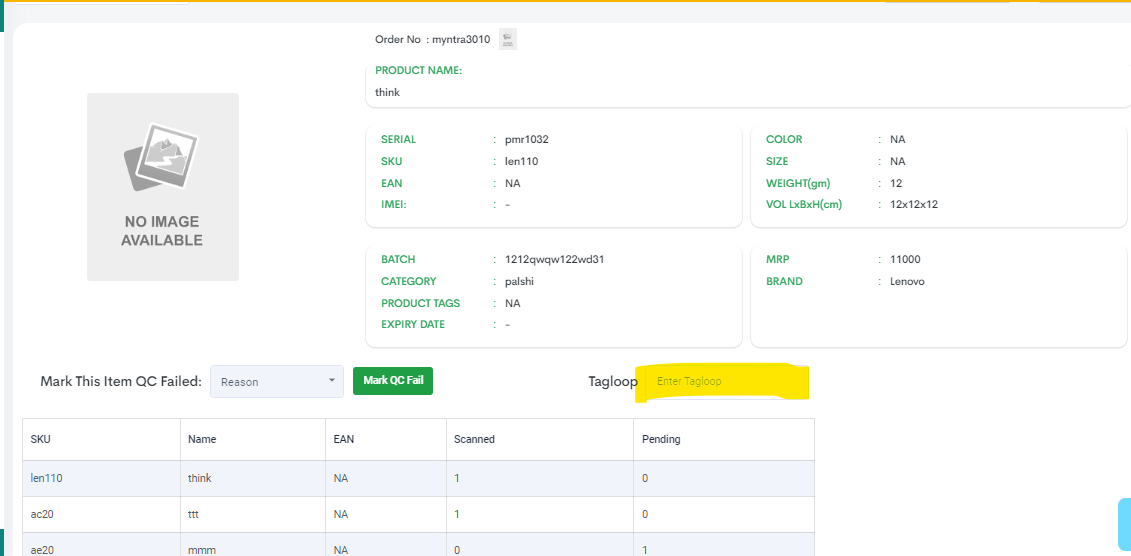
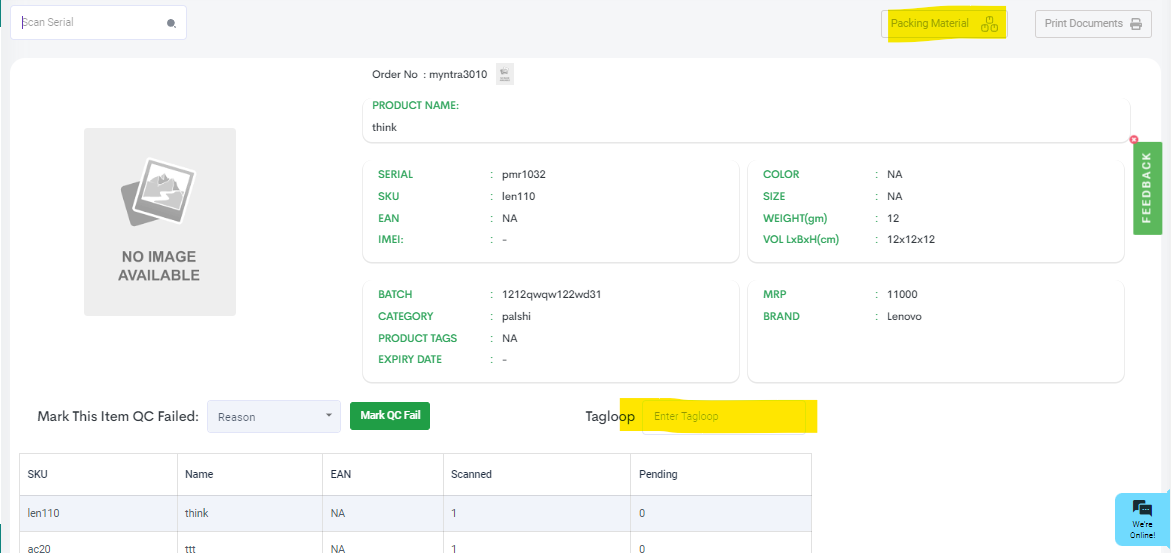
CASE-5: ONLY TAG LOOP IS REQUIRED
For Myntra orders, a tag loop is required, then upon scanning the SKU/EAN/USN, the Cursor will be auto-focused on the tag loop input box, and as soon as the tag loop is captured, the order documents (invoice and label) will be generated.
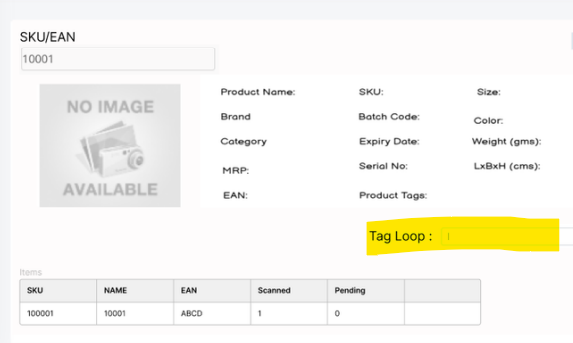
If you don’t want to assign the tag loop then you can click on the ‘Print Documents’ button to generate the documents.
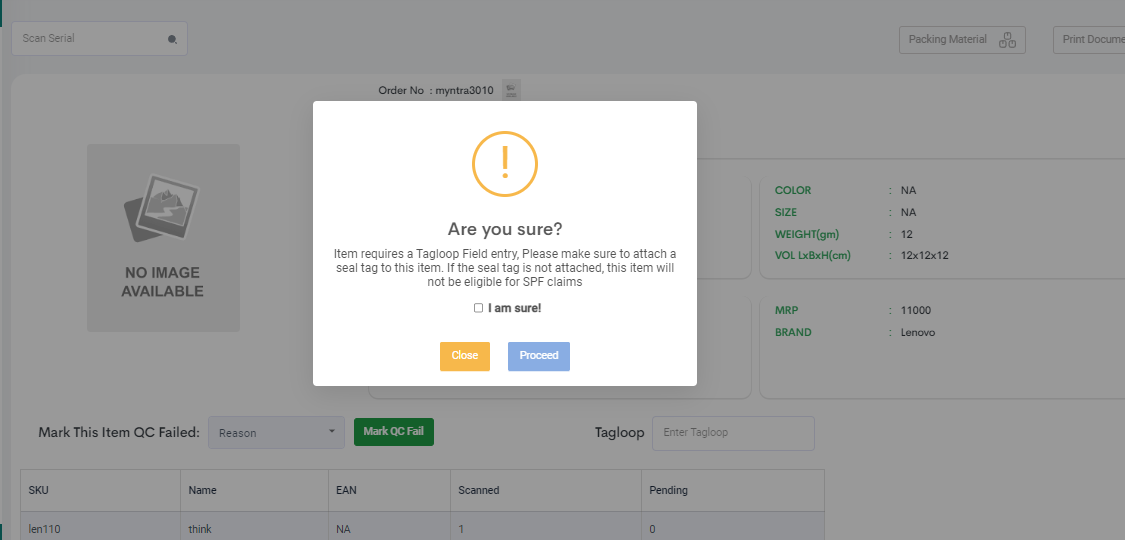
Please note, upon clicking the ‘Print Documents’ button, the system will ask you for your consent as shown below

After providing this consent you may “Proceed” and the documents (label and invoices) will get printed.
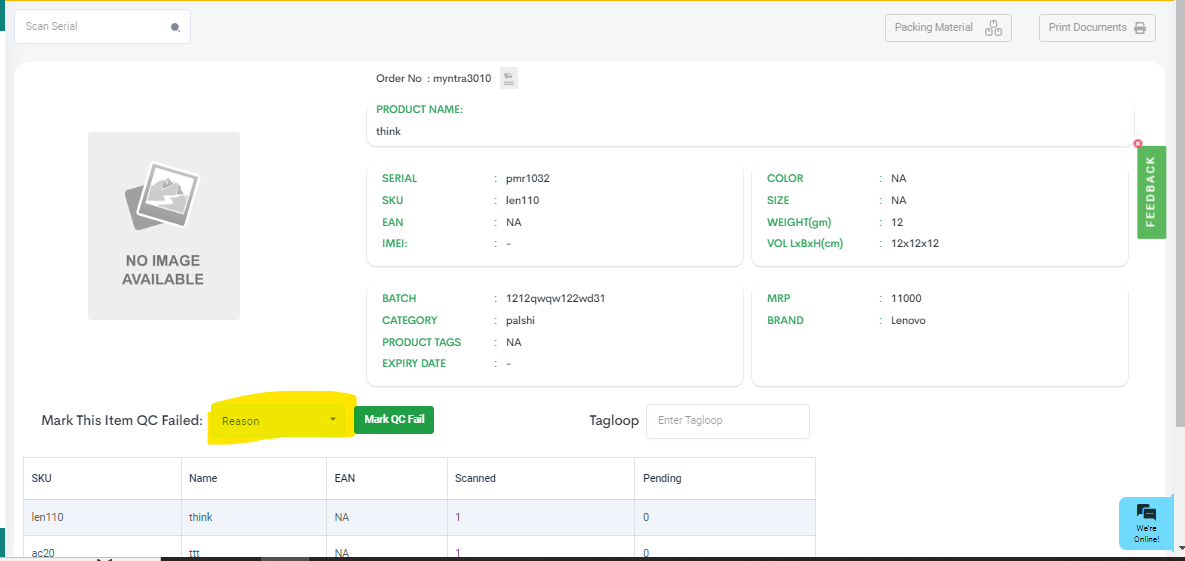
CASE-7: QC ENABLED AND TAG LOOP IS REQUIRED.
In case your account has Outbound QC enabled, and if the tag loop is required, then upon scanning of the Item the cursor will be auto-focused to the Tag loop input field, where you are expected to scan the Tag loop, and upon scanning documents will be generated.
If the condition of the item is damaged, then you should select the QC fail reason and mark this item as QC Fail, upon this action no documents will be generated and the system will revert to the item Scanning window.
CASE-8 :QC ENABLED AND BOTH TAG LOOP AND PACKING MATERIAL IS REQUIRED
If the account has Outbound QC enabled, and if both tag loop and packing material is required, then upon scanning of Item-
If the item is in good condition, the cursor will be auto-focused to the input field of the Tag loop, once the Tag ID is scanned, a modal will appear to capture the packing material.
Once captured, the relevant document (invoice and label) will be generated.
In case, you don’t want to scan the Tag loop ID, you may click on the Packing material button on which a modal will appear to capture the packing material.
Before selecting the packing material the system will ask for your consent as shown below
After the consent is provided, the order documents will be printed directly.
Points to be Noted:
1)The ‘Print Documents’ button is disabled in case 8 (QC ENABLED AND BOTH TAG LOOP AND PACKING MATERIAL IS REQUIRED) until the packing material has been captured successfully in the system.
2) QC can be enabled from the backend and the serialized inventory mode must be ON for this from the account settings>>other settings
Additional features
Related Articles
Packing station for B2C Orders
Software Plan: Starter, Growth & Enterprise Account Type: Seller Account, Aggregator & 3PL Inventory Type: Serialized & Non-Serialized Feature Description The packing station is where the products are checked and packed before shipping. The station ...B2B Order Processing (New)
Software Plan : Growth & Enterprise Account Type : Seller Account Inventory Type : Serialized & Non-Serialized Feature description Easyecom announces a significant upgrade to its B2B order processing platform, prioritizing enhanced efficiency, ...B2B Order Processing
EasyEcom enables you to seamlessly process bulk orders of multiple wholesale customers from a single dashboard. In this guide, we have explained the step-by-step process for processing B2B orders. Step 1: In the toggle menu, navigate to “Orders >> ...FAQ Order Processing
1. Do I need to add dimensions manually? You should add dimensions manually. You can give the dimensions in Product Master and then the dimensions will be auto picked. 2. From where does EasyEcom fetch the returned data? In the toggle menu, ...How to Process Order with Digital Product?
Software Plan : Starter, Growth & Enterprise Account Type : Seller Account Inventory Type : Serialized & Non-Serialized Feature description EasyEcom allows you to create orders that include digital products. There are two ways to add digital products ...