B2C- Mark Return via Gate Entry and QC Process

Software Plan : Growth & Enterprise
Account Type : Seller Account and 3PL
Inventory Type : Serialized & Non-Serialized
Feature description
Return management encompasses a series of steps to handle returned goods efficiently. The process ensures that returned items are properly tracked, inspected, and either restocked or disposed of, depending on their condition. This includes gate entry and quality check processes, which are crucial for maintaining inventory accuracy.
Return Gate Entry
Step 1: Go to Inventory (main menu) > Gate Entry > Create Gate Entry
Step 2: Select B2C Gate Entry
Step 3: Fill in the required details (Please note: the asterisk (*) marked details are mandatory)
After filling the details, click on Submit
After filling the details, click on Submit

In case of 3PL, select seller location and then fill the required details.
The Gate entry is completed and the system will generate a Gate Entry ID. You will now be redirected to the following page.
In Reference Number option, you may mention your e-way bill number or debit note id
Step 4: Select the return entity, and scan the ID of the selected entity.
You may scan any of these entities based on your convenience.
OR
You may also manually click the Action button associated with the gate entry ID to Start Scanning.
Step 5: Once you have scanned the entity, you may either choose manual POD validation (Complete Scan and Start POD validation) or auto POD validation (Complete scan without POD validation).
In case of 3PL this page also displays the seller name.
POD: A Proof of Delivery (POD) is a document that serves as written evidence of the proper delivery of a shipment. The carrier issues the document, which must be acknowledged by the recipient to confirm the correct delivery of the goods.Scenario 1 - Complete Scan without POD Validation
In this scenario, In this scenario, the system assumes that all packets correspond to the POD details.
Provide your consent by clicking "I Agree" and "Proceed" to Continue
A return manifest will be generated, wherein the POD verification will be stated as Auto Verified.
Scenario 2 - Complete Scan and Start POD Validation
In this scenario, the system will manually verify the scanned data. If the data you physically scanned, matches the data in the system, the system will validate it.
When the POD validation is started, you will have to scan the POD data (POD data will be the same entity that was scanned while creating the gate entry)
A return manifest will be generated, wherein the POD verification will be stated as Yes.
Scenario 3: Wrong POD verification.
In this scenario, if you scan incorrect or different data during POD verification, the packet will be added but the POD will not be verified.
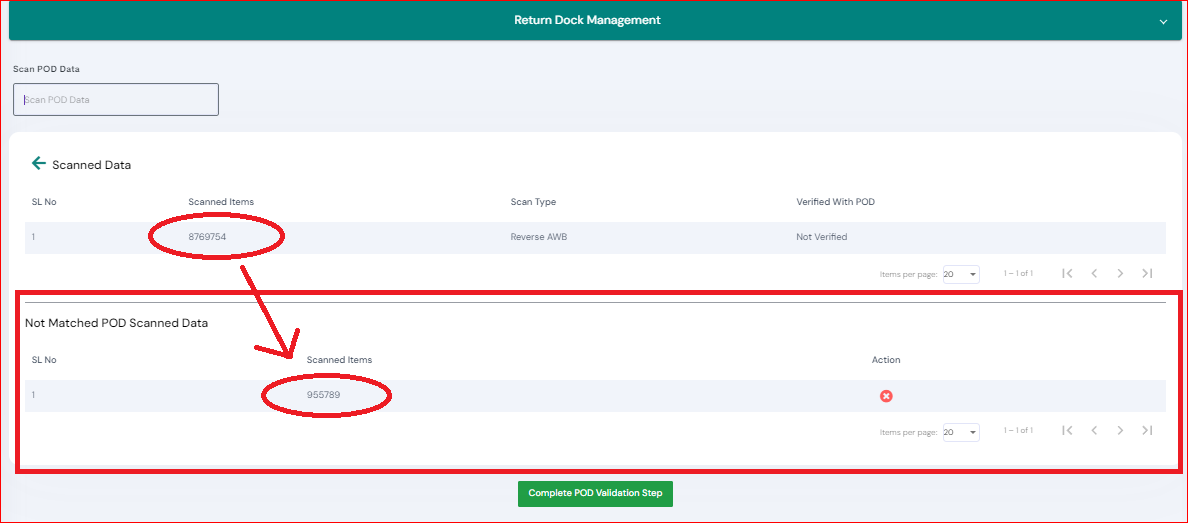
A return manifest will be generated, wherein the POD verification will be stated as Yes.
Once the return manifest is created, the status of the order will be Completed. You may click on the eye button and view the scanned data or download the return manifest
QC Process (Non Serialized)
Step 1: Go to Inventory (main menu) > Return QC > Start QC
Gate ID entries will only be displayed in the QC tab once their manifest has been generated.
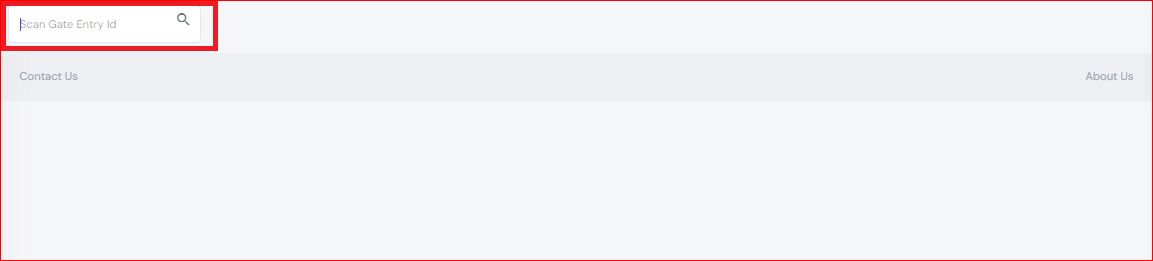
Step 2: Scan the Gate Entry ID.
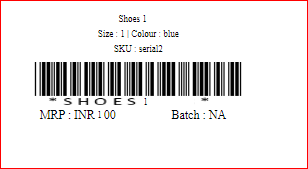
Step 3: Scan the Packet Number. (Packet Number will be the same entity that was scanned while creating the gate entry- i.e., Order number/ Reverse AWB/ Forward AWB)
Step 4: Scan the SKU to view the details of the return
Step 5: After the first scan, all the details of the product will be shown on the page. Scan the item again to start the QC process.
Step 6: As you scan each item, the quantity will be automatically added to the "QC Processed" column.
Step 7: When all the items are successfully scanned, click on "Mark QC Pass"
Step 8: Click on "Complete QC"
A pop will appear stating all the items are successfully scanned for QC.
QC Process (Serialized)
Step 1: Follow Step 1 to Step 3 from QC Process (Non Serialized)
Step 4: Scan the serial number, you may also find the serial number by clicking on "Show Available Serials"
Step 5: After the first scan, all the details of the product will be shown on the page. Scan the serial again to start the QC process.
Step 6: As you scan each serial, the quantity will be automatically added to the "QC Processed" column.
Step 7: When all the items are successfully scanned, click on "Mark QC Pass"
Step 8: Click on "Complete QC"
A pop will appear stating all the items are successfully scanned for QC.
QC Process- Lost Items
Scenario 1: Complete QC Lost Return
Example- The complete QC is lost when, during the return quality check, the seller is unable to scan the item because when they open the box, the item is not in the box at all
Step 1: Click on "Mark QC Lost" without scanning an item/serial.

Step 2: Mention the quantity and click on "Mark QC Lost"
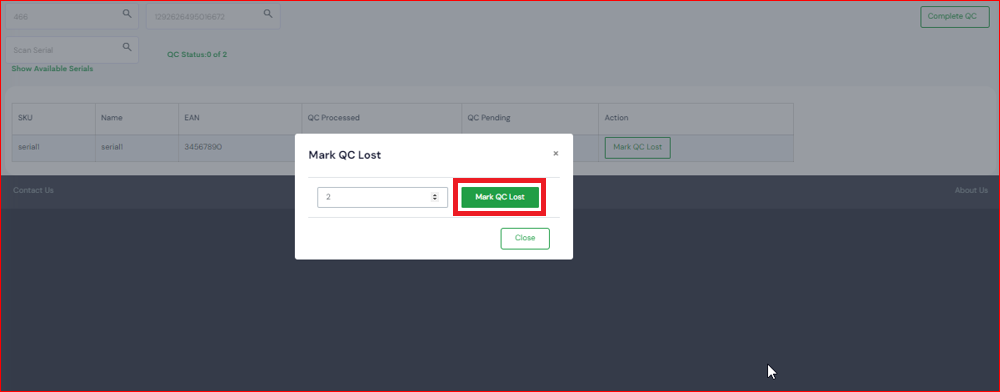
The quantity of lost items cannot exceed the total returned quantity. If you enter a higher quantity, the system will generate an error.
Step 3: Click on "Complete QC"
A pop will appear stating all the items are successfully scanned for QC.
Scenario 2: Partial QC Lost Return
Example- Partial QC lost happens when items are partially scanned because some of the items are not physically received, so those items are considered QC lost.
Step 1: To mark the item as lost during the QC process, Click on "Mark QC Lost"
Step 2: Select the quantity of the lost items and click on "Mark QC Lost"
Step 3: Provide your consent by clicking "I Agree" and "Proceed" to Continue
Step 4: When all the items are successfully scanned, click on "Mark QC Pass"
Step 5: Click on "Complete QC"
A pop will appear stating all the items are successfully scanned for QC.
QC Process- For QC Fail Items
Step 1: Follow Step 1 to Step 3 from QC Process (Non Serialized)
Step 4: Click on the inventory "Status".
Step 5: Choose the reason for QC Fail
Step 6: After selecting the reason, click on "Mark QC Failed"
Step 7: A pop will appear asking the reason. Mention the reason. You may also upload the image if available by clicking on "Upload Image". (Uploading or capturing image is optional)
Step 8: Once the image is uploaded, click on "Upload" to finalize.
Step 9: When all the items are successfully scanned, click on "Complete QC"
A pop will appear stating all the items are successfully scanned for QC.
QC Process- Swap Serial for Partially Returned Items (For serialized accounts)
Example- Imagine you are a seller and you have sent 10 items in an order. The customer returns 5 items because they are damaged. When you receive the 10 items, you scan the serial number of each item. However, some of the serial numbers of the items you marked as returned do not match the returned items. In this case, you can consider serial swapping.
Step 1: Follow Step 1 to Step 3 from QC Process (Non Serialized)
Step 4: Scan the serial
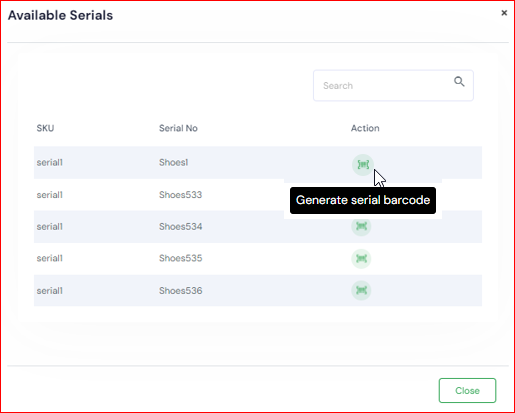
You may check the serials of the items for which the return is created. Click on "Show Available Serials"
A list of serials will be shown in a pop up. You may click on the Barcode option to generate the barcodes.
Step 5: To swap the serial with another serial in the order, scan the serial which is present in the order but not available in the above list of serials
You may check the serials by going to Order details > Inventory Tab > Serials
Scan the swapped serial
Serial numbers can only be swapped within the same packet. If an order contains multiple packets, serial numbers cannot be moved between packets.
For example, if a seller has an order with 10 serial numbers and creates two return packets, each containing 3 serial numbers, they cannot swap serial numbers between the packets. However, they can swap any serial number within a packet with another serial number from the same order that they received.
Step 6: Once all the items are scanned, click on "Mark QC Pass"
Step 7: Click on "Complete QC"
A pop will appear stating all the items are successfully scanned for QC.
The status of the Gate Entry Id will be shown as "QC Completed".
You may now complete the Putaway of the items.
Video
Other Related Articles
Related Articles
Outbound Quality Check (QC)
What is Outbound QC? Outbound QC is a quality check process through which you can inspect every Unit before shipment to verify that each Unit complies. If any or all Units are not in compliance, you can immediately replace the non-conforming units ...HHT - Putaway - QC Fail Putaway
Software Plan : Growth & Enterprise Account Type : Seller Account & Aggregator 3PL Inventory Type : Serialized Feature Description The QC-Fail Putaway feature is designed to handle the storage of items that fail Quality Check during inward processing ...Returns: Quick Scan Flow
Software Plan: Starter Account Type: Seller Account Inventory Type: Serialized & Non-Serialized Feature description This feature introduces a streamlined return management system for EasyEcom users, particularly focusing on improving efficiency for ...Inward(GRN) Gate Entry
Software Plan: Growth Account Type: Seller Account & 3PL Account (Settings-based) Inventory Type: Serialised and Non-Serialized Overview Inward Gate Entry is used to inward shipment boxes before GRN processing. Warehouse teams can: create inward ...HHT - Putaway - Returns Putaway
Software Plan : Growth & Enterprise Account Type : Seller Account & Aggregator 3PL Inventory Type : Serialized & Non-Serialized Feature Description The Returns PutAway process is the final step in handling returned items in the warehouse. Once a ...