How to Create Pending Returns?

Software Plan: Startup, Growth & Enterprise
Account Type: Seller Account
Inventory Type: Serialized & Non-Serialized
Feature description
The "Pending Returns" feature allows businesses to manage anticipated returns that have not yet been physically delivered to the warehouse. This functionality ensures that all expected returns are documented and tracked efficiently, facilitating better inventory management and customer service.
Create Pending Return
Step 1: Click on the (+) icon. Select "Create Pending Return"
Step 2: Download the template.
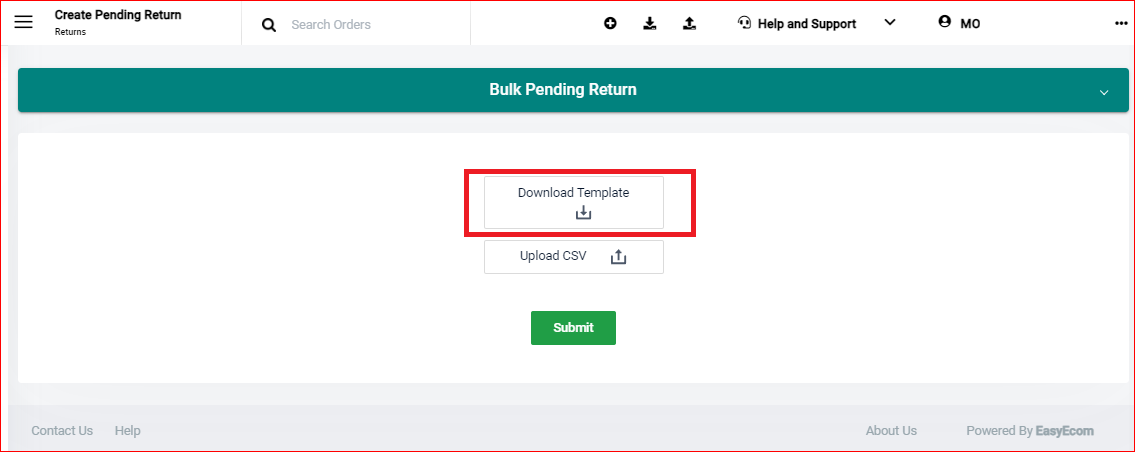
Step 3: Fill in the mandatory columns in the sheet.
| Order Number | Order ID for which the return is initiated |
| Parent SKU | Parent SKU of a Simple Product or Combo Product |
| Child SKU | Child SKU if it belongs to any Combo, else mention the same as Parent SKU |
Return Quantity | Quantity to be returned |
| Return Initiated Date | The date on which the return was initiated (DD-MM-YYYY) |
| Return Reason | Reason for the return |
| Return Type | Choose the return type as "Customer" or "Courier" |
| Return AWB | Airway bill number for the return |
| Return Carrier Name | Name of return shipping carrier |
Return Id | Marketplace Reference identifier if any (optional) |
Marketplace Return Date | Date of return from the marketplace (optional) |
Step 4: Upload the file and click on Submit
Click OK to finalize
Go to Import Section to view the file status
After you've successfully uploaded the file, your pending return will appear on your order. Check your order details and navigate to the "Return" tab.
OR
Step 1: Go to Order Details > Return Tab (1) > Choose Initiate Return option (2) > Select the Return Reason (3) > Select the suborder (4) > Mention the Return Quantity (5) > Click on Initiate Return (6)
Step 1: Go to Order Details > Return Tab (1) > Choose Initiate Return option (2) > Select the Return Reason (3) > Select the suborder (4) > Mention the Return Quantity (5) > Click on Initiate Return (6)
Step 2: Click on "Create Return Order"
Step 3: A pending return will be created.
Report
The uploaded details will be shown in the Pending Returns Report.
Step 1: Go to Reports (main menu) > Pending Returns Report
Step 2: Select the required fields and apply the date filter. Then, click on Run Report to view the details.
The details will appear on the same page.
OR
Step 2: Select the required fields and apply the date filter. Then, click on Download Report to view the details.
Step 3: Go to the Export section to download the Excel sheet.
Related Articles
Create "Initiate Returns" in Easyecom
Software Plan: Startup, Growth & Enterprise Account Type: Seller Account, Aggregator Account & 3PL Account Inventory Type: Serialized & Non Serialized Feature Description The "Initiate Return" process is required when the customer places a return ...Steps to Mark Returns in EasyEcom
Software Plan: All Account Type: Seller Account Inventory Type: Serialized & Non-Serialized Overview This feature allows marking returns for orders manually from the Returns screen. You can process returns at sub-order level or apply return details ...Returns: Quick Scan Flow
Software Plan: Starter Account Type: Seller Account Inventory Type: Serialized & Non-Serialized Feature description This feature introduces a streamlined return management system for EasyEcom users, particularly focusing on improving efficiency for ...Reason Master – Configure QC Reasons for GRN, Returns, and Outbound
Software Plan: Growth & Enterprise Account Type: Seller Account Inventory Type: Serialized & Non-Serialized Description Reason Master allows sellers to define and manage Quality Check (QC) reasons used during inventory processing. These reasons are ...What is Marketplace Alias? How to add Marketplace Alias?
Software Plan : Starter, Growth and Enterprise Account Type : Seller Account & Aggregator Client Inventory Type : Serialized & Non-Serialized Feature Description This feature empowers sellers to create a unique alias (pseudo name) for their ...