SKU Mapping across Accounts
Step 1: Create the Master sku in Primary and Secondary (child) accounts.
To know the procedure for creating the master sku click on below link and follow the steps mentioned in pdf.
https://support.easyecom.io/portal/kb/articles/steps-to-create-master-sku-in-easyecom
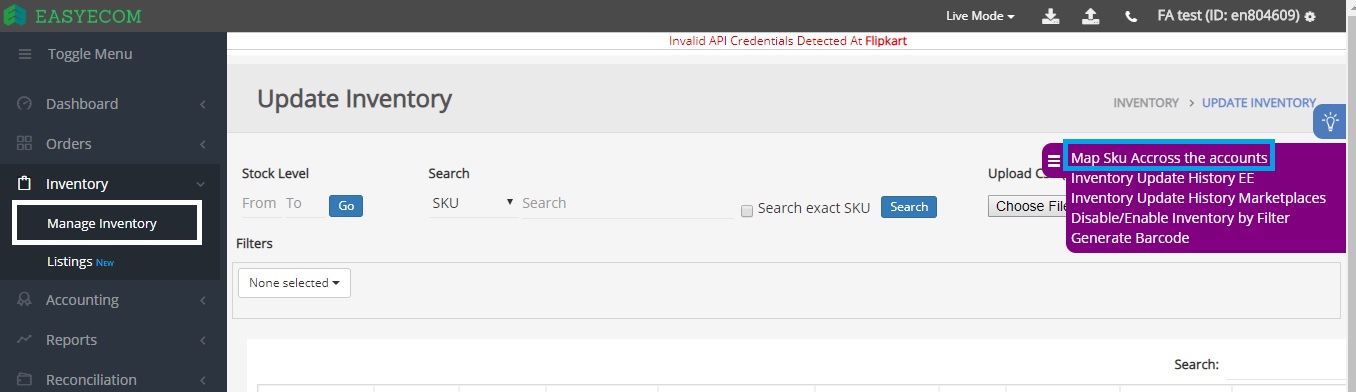
Step 2: Go to Primary account --------> Inventory ---------> Manage Inventory, Drag the purple Burger and click on Map sku across the accounts
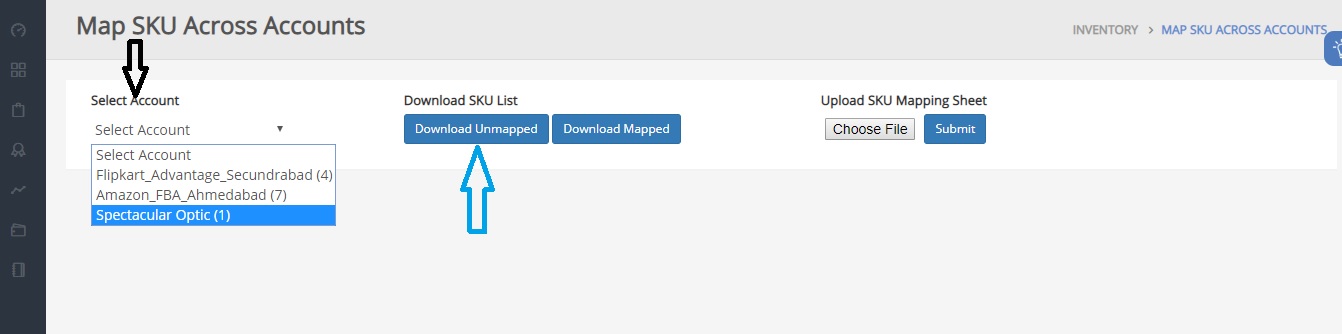
Step 3: Select the child account and click on download unmapped sku list
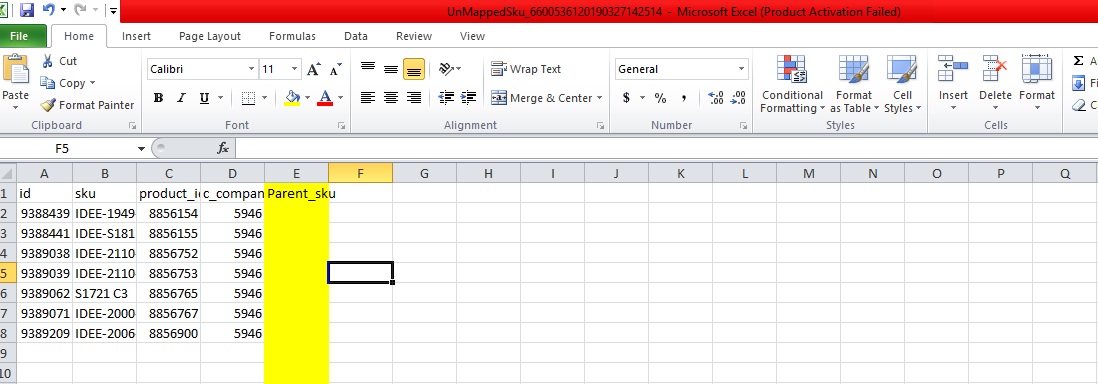
Step 4: Fill the Parent Sku column and then save it
Step 5: Click on choose file and submit

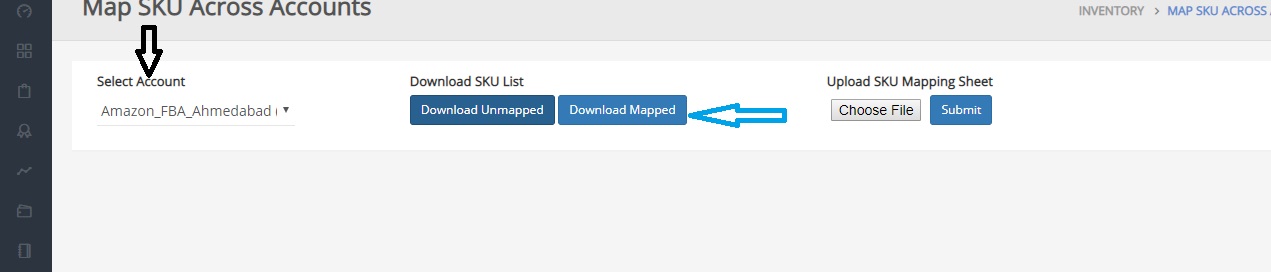
Step 6: If you want to check the mapped listing, select the account and click on Download Mapped.
Related Articles
Manage Listings (SKU mapping/unmapping)
Software Plan: Starter, Growth & Enterprise Account Type: Seller Account & Aggregator 3PL Inventory Type: Non-Serialized & Serialized Feature Description SKU is a unique identification number assigned to your product listed across multiple e-commerce ...Mapping Warehouse Bins with SKU
Software Plan: Starter, Growth & Enterprise Account Type: Seller Account, Aggregator & 3PL Inventory Type: Serialized & Non-Serialized Feature description When a specific SKU has been pre-mapped to a particular bin location within the system, the ...Creating and Managing Purchase Orders
Overview This article explains how to create and manage Purchase Orders (POs) in Easyecom, including PO creation, approval, SKU management, PO expiry handling, GRN restrictions, and system-driven PO closure. If ASN flow is enabled, PO progresses ...Syncing Tally ERP 9/Prime SKU codes with EasyEcom
Once you integrate your Tally ERP/Prime account with EasyEcom, you no longer have to manage your accounting manually. Once the integration is live, EasyEcom will automatically sync your Tally products, invoices, credit notes, and payments. You can ...Integrating Zoho Books with EasyEcom
This guide explains how to connect Zoho Books with EasyEcom for syncing products, sales orders, invoices, and returns. Integration Steps Step 1: Navigate to ERP Integration & Select Zoho Go to: Accounting → ERP Integration → Zoho Books → Add Step 2: ...