Recording Goods Received Note (Growth Plan)
A Goods Received Note (GRN) is an internal document produced by the warehouse team after inspecting the goods once they have been delivered at the warehouse.
Recording GRNs in EasyEcom will enable your team to easily locate inventory at your warehouse, and ensure that you only list products across sales channels that meet your quality standards.
There are two ways of recording GRN in EasyEcom. You can either create GRN one-by-one or in bulk.
By following the below-mentioned process you can easily record GRN in the system.
Step 1: In the toggle menu, navigate to “Inventory>>Purchase Orders”
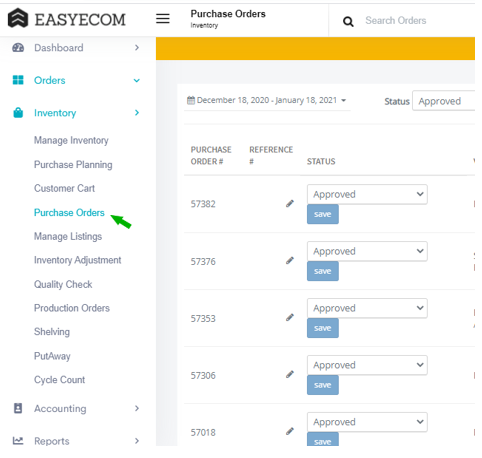
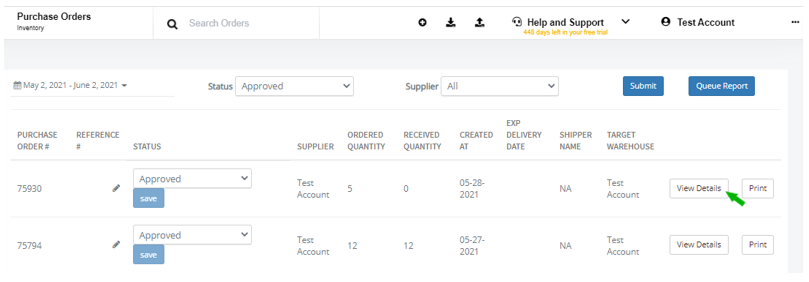
Step 2: Click on View Details
You can create a GRN against a Purchase Order that has been approved.
Select status as “Approved”, and then click on the “View Detail” button.
Step 3: Click on “GRN”
Once you click on View Details, the Order Details pop-up will be visible on your screen.
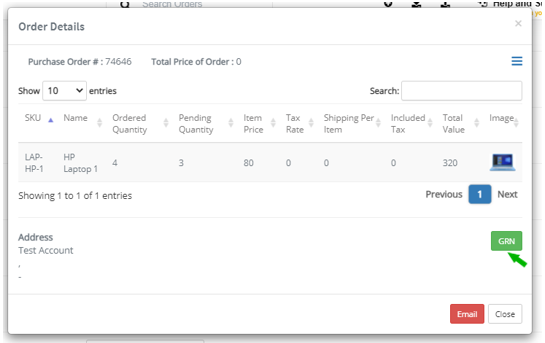
Here click on the “GRN” button.
You can now create GRN one-by-one or in bulk.
Recording GRN One-by-One
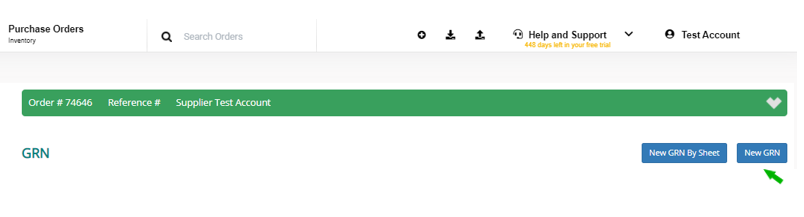
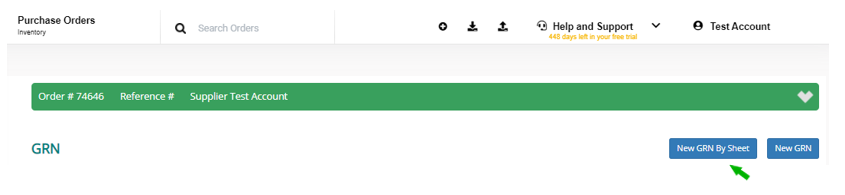
Step 1: Click on “New GRN”
If you want to record GRN one-by-one click on the “New GRN” button.
Step 2: Click on “Create GRN”
Enter Supplier Invoice Id and date. In case you have not received an invoice from your supplier, select “Invoice Later”.
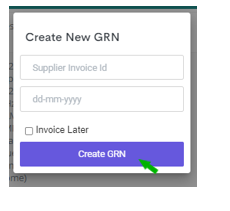
Then click on “Create GRN”.
Step 3: Add items
You can now add items you have received.
To add items, first click on the “Add Item” button.

Enter the SKU code of the inventory received.

- Enter the quantity received.
You can also enter the Batch Code and any other additional cost incurred in the purchase.

You can enter the Shelf Location and Quality Check status while recording or GRN. In case you want to complete these steps in future click on the “Later” option.
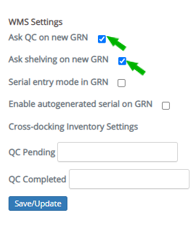
Then click on the “Save” button. If your team always completes shelving and quality check at a later stage, you can remove Shelving and Quality check steps.
To do that, navigate to “Account Settings>>Other Settings”, and disable “Ask QC on new GRN” and “Ask shelving on new GRN” from WMS Settings.
Note: In case you want to record inventory received at item-level barcoding or want to record expiry dates of products and manage inventory using First Expiry First Out model (FEFO) model, please upgrade to the Enterprise Plan
Please note that the products received will be only listed across channels when you have completed the quality check and assigned a shelf to the inventory item.
To complete quality check and shelving at a later time, please follow the steps explained below.
Entering Quality Check status in the system
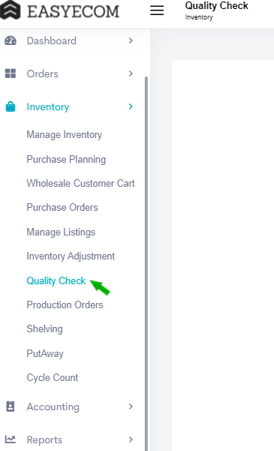
Step 1: In the toggle menu, navigate to “Inventory>>Quality Check”
Step 2: Enter all details
On the Quality Check screen, enter all the details required.
Select status as “Pass” if the received inventory meets your quality standards”.
Select status as “Fail” if the received inventory doesn’t meet your quality standards”.

Assigning shelves in the system
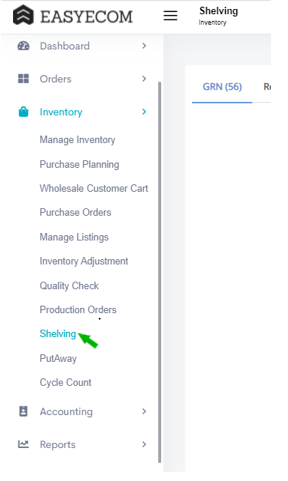
Step 1: In the toggle menu, navigate to “Inventory>>Shelving”
Step 2: Enter all details
Here select the “GRN” tab and then enter all details.
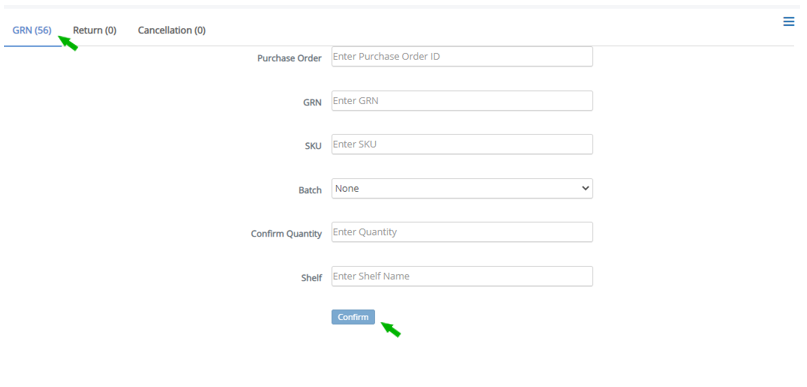
Then click on the “Confirm” button.
All the inventory items that have passed quality check and are assigned a shelf will be live across channels.
Recording GRNs in Bulk
Step 1: Click on “New GRN By Sheet”
If you want to record GRNs in bulk click on the “New GRN By Sheet” button.
Step 2: Download Bulk File Template
To download the bulk GRN excel file, click on the “Save Template” button.

Step 3: Fill in all necessary details
In this excel file fill in all mandatory details.

Mandatory fields:
SKU
Quantity
Shelf
Cost of a single unit
QC Pass count
QC Fail count
Then save this file in your system.
Step 4: Upload this file to EasyEcom
To upload this file, click on “Choose File” select this bulk GRN file from and upload it.
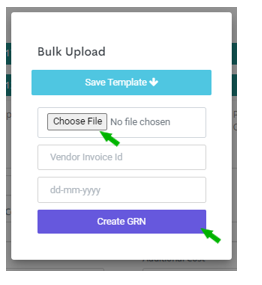
Enter Invoice ID and data and then click on the “Create GRN” button.
You have now successfully created a GRN in bulk. All the inventory items that have passed quality check will be listed across sales channels.
Related Articles
Recording Goods Received (Starter Plan)
Once you record your goods received in the system, they will be live across all your sales channels. There are two ways of recording stock received. You can record them against a purchase order or without it. Recording Goods Received against a ...Recording Return to Vendor (RTV) Adjustments in EasyEcom
You can easily record Return-to-Vendor adjustments in EasyEcom one-by-one or in bulk. Recording RTV one-by-one Step 1: In the toggle menu, navigate to "Inventory>> Inventory Adjustment" Step 2: Click on "Create Manual Adjustment" Click on the ...Inventory Planning by Days Report
What is the “Inventory Planning by Days” Report? The "Inventory Planning by Days" report is a comprehensive analysis that provides data to help plan the inventory using historical data over a specified time period. This report is designed to assist ...HHT - Start inwarding items - GRN
GRN: GRN is recorded against purchase orders. To know more on how to create purchase orders, refer to the article 'Creating Purchase Orders'. You can create GRN using both web and android. In this article, we will discuss on how to use android to ...How to manage Dynamic Virtual Inventory in Easyecom
Software Plan: Startup, Growth & Enterprise Account Type: Seller Account Inventory Type: Serialized & Non Serialized Feature description The Dynamic Virtual Inventory feature allows you to push more inventory than you have in stock across different ...