Integrating Magento-2 panel with EasyEcom panel
Users can easily integrate Magento 2 storefront with EasyEcom by following the below-mentioned process.
Step 1: On the Dashboard go to Account Settings>Add Channels
This will lead you to the following webpage:
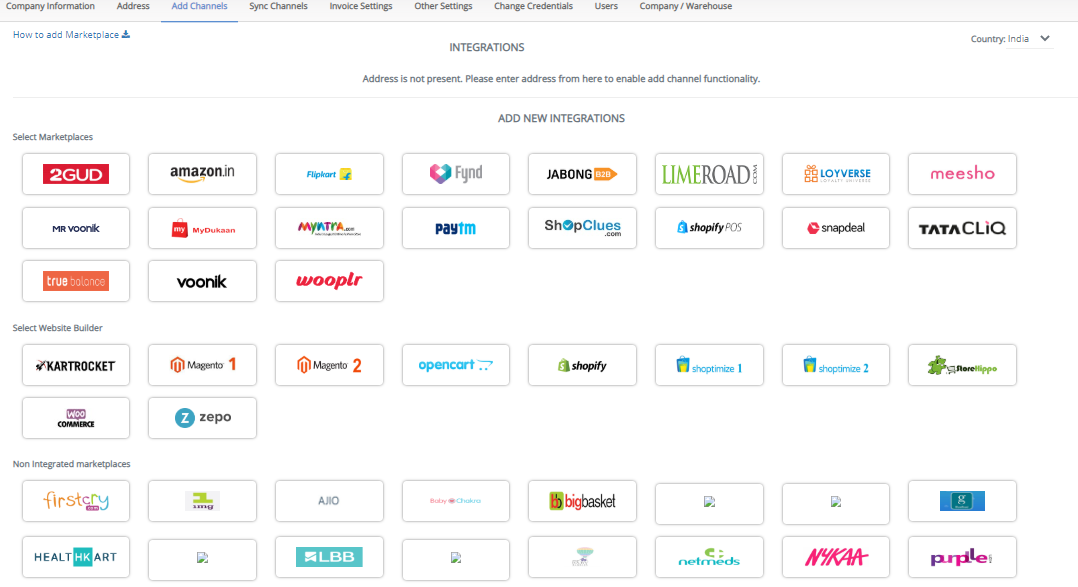
Step 2: Select Magento 2
From the Select Website Builder category click on Magento 2

Once the user clicks on Magento 2 he will be required to provide the following information:
URL: URL of your Magento 2 account
For auth token, follow below steps:
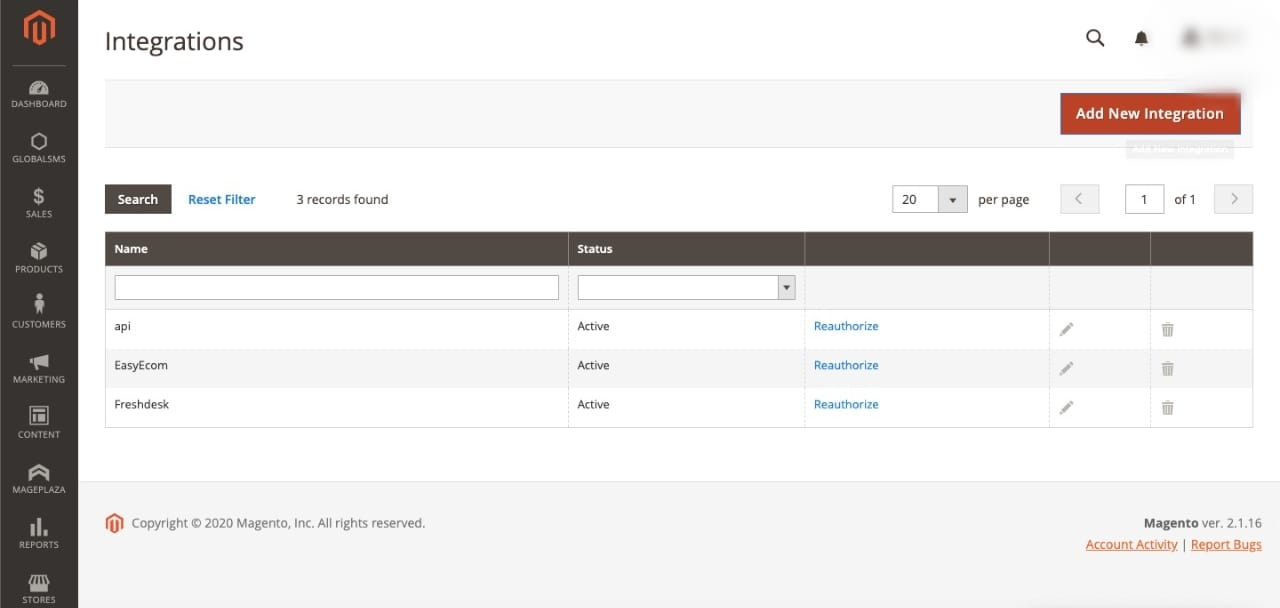
Steps to be followed on Magento 2 account
Step 1:On your Magento 2 account, go on Systems>>Extensions>>Integrations

Step 2: Click on Add New Integrations
This will lead you to the following page, click on the “Add New Integrations” button.
Step 3: Provide necessary information
Once the user clicks on Add New Integration s/he will be navigated to the following page.

Provide Integration Info here:
Name
Your password will automatically be the prevailing Magento 2 account password.
Under Basic Settings, the next option is API, click on it.
The user will be navigated to the following page.
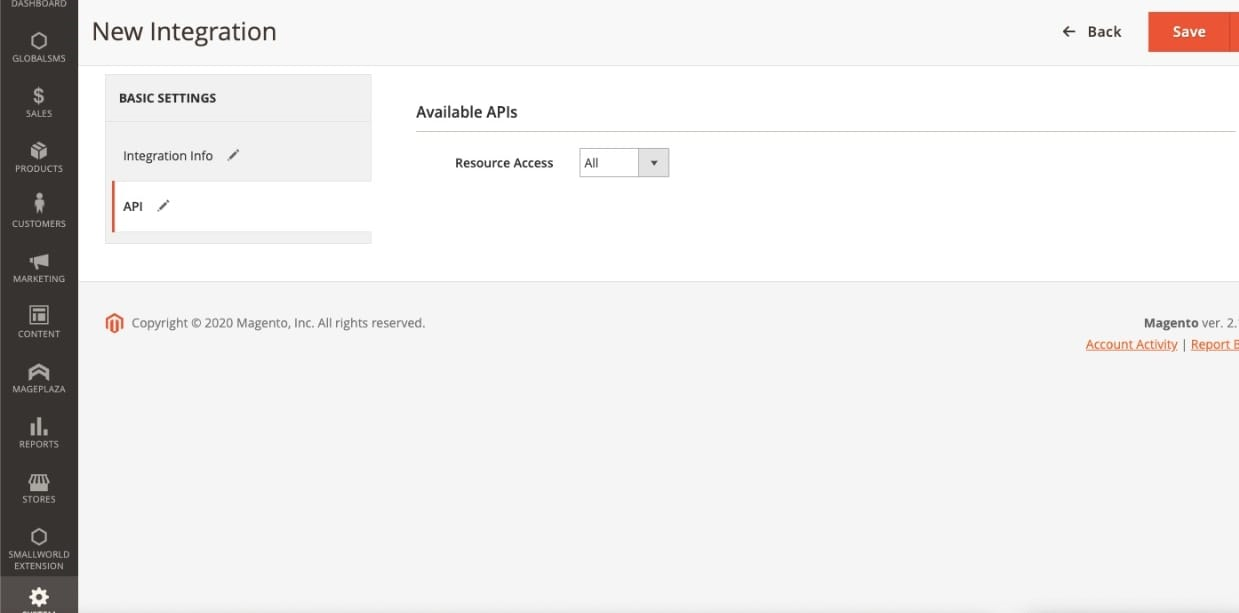
Give Resource Access to all the Available APIs and click Save.
NOTE: Click on Save after completing the whole Basic Settings info.
Step 4: Provide your Access Token
After the user has completed the steps mentioned above, the Magento 2 system would generate an Access Token number.

In the EasyEcom system, write this Access Token under Auth-Token.
You have now successfully integrated Magento 2 with EasyEcom.
Please note the status assigned to your order in EasyEcom and Magento 2 during different order stages.
Related Articles
Integrating Magento-1 panel with EasyEcom panel..
Please follow the following steps to integrate your Magento-1 panel with EasyEcom panel Step 1:- Login to your Magento-1 panel through your login URL. Step 2:- Navigate to SYSTEM option. Step 3:- In System option click on WEB SERVICES -> ...Integrating Loqally with EasyEcom
This guide explains how to configure the Loqally integration in EasyEcom, and also supports reverse shipment. Step 1: Navigate to Carrier Master Masters > Carrier Master Step 2: Click on 'Add New' and Select 'Loqally Outbound' from the dropdown Step ...Integrating BoxD Logistics with EasyEcom
This guide explains how to configure the BoxD Logistics integration in EasyEcom, and also supports reverse shipment. Step 1: Navigate to Carrier Master Masters > Carrier Master Step 2: Click on 'Add New' and Select 'BoxD Logistics Outbound' from the ...Integrating RapidShyp B2B with EasyEcom
This guide explains how to configure the RapidShyp B2B integration in EasyEcom. Prerequisite RapidShyp B2B works only for accounts where the New B2B Module is enabled. For B2B order processing flow, refer to: B2B Order Processing - New Workflow Step ...Integrating SharkShip Outbound with EasyEcom
This guide explains how to configure the SharkShip carrier integration in EasyEcom for shipment creation and shipment cancellation. Step 1: Navigate to Carrier Master Masters > Carrier Master Step 2: Click on 'Add New' and Select 'Sharkship Outbound' ...