Creating Order Batches and Pick-list
Step 1: Go to Orders ---------> Order Batches
Step 2: Click on the hamburger menu and then Create New Batch

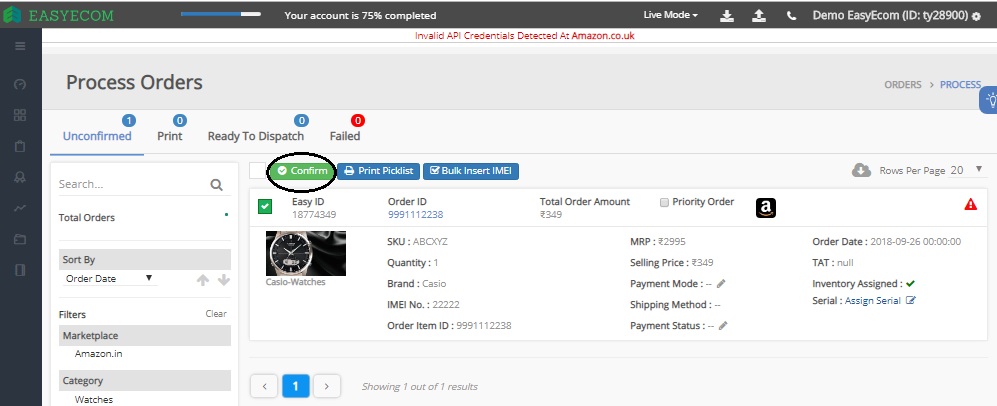
Step 6: You can assign the picker and packer. Users who are registered as either a picker or packer on the settings page, those user names will reflect under both dropdowns.
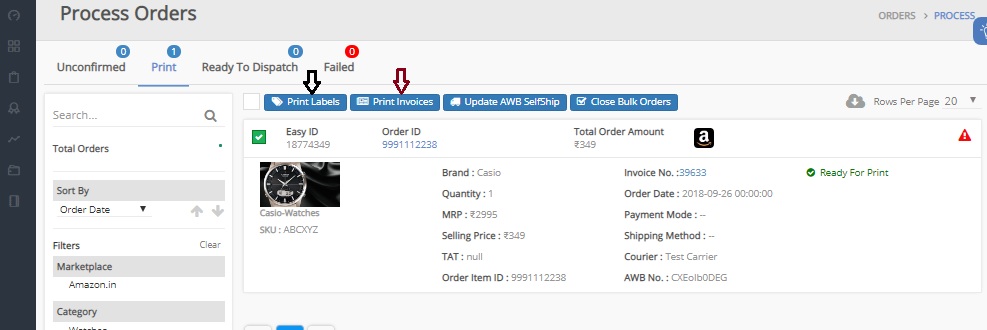
Step 9: Now order moved to the Print tab, select the order and click on Print Labels and Print Invoice to download the Labels
________________________
Step 10: Go to Generate Pickup Manifest
Select Marketplace
Select Courier Service
Select Order
Add to Manifest
Create Manifest
Related Articles
HHT - Picklist & Short Picking Process
Picklist: You can view a single picklist for all the orders that are assigned to a batch, pick inventory items at your warehouse location and scan it. The app also helps you identify the remaining items that you need to pick to complete order ...Order Batches & Packing Station for B2C orders
Software Plan: Starter, Growth & Enterprise Account Type: Seller Account, Aggregator & 3PL Inventory Type: Serialized & Non-Serialized Feature Description The packing station is where the products are checked and packed before shipping. The station ...Creating STN order in Easyecom
Software Plan: Growth & Enterprise Account Type: Seller Account Inventory Type: Serialized & Non Serialized Feature description A stock transfer note is created to authorise the movement of inventory from one location to another different location. ...B2B Order Processing (New)
Software Plan : Growth & Enterprise Account Type : Seller Account & 3PL Inventory Type : Serialized & Non-Serialized Overview Easyecom announces a significant upgrade to its B2B order processing platform, prioritizing enhanced efficiency, streamlined ...How to Process Order with Digital Product?
Software Plan : Starter, Growth & Enterprise Account Type : Seller Account Inventory Type : Serialized & Non-Serialized Feature description EasyEcom allows you to create orders that include digital products. There are two ways to add digital products ...