Integrating BytePe with EasyEcom
This article explains how to integrate BytePe with EasyEcom and the supported integration flow.
Workflow
Step 1: Open Add Channels
Go to: Settings → Add Channels
Step 2: Select BytePe
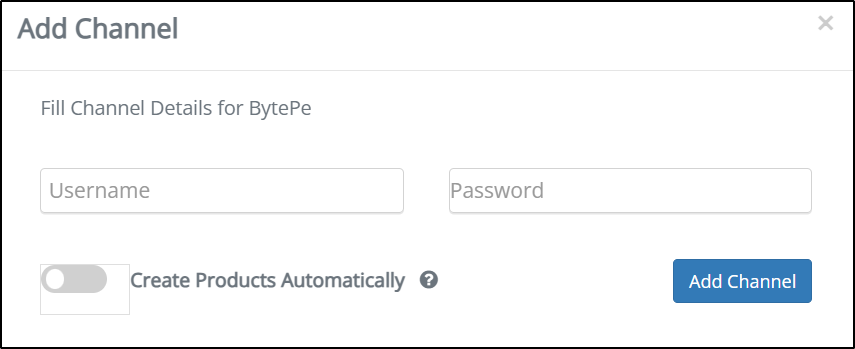
Step 3: Enter BytePe Integration Details
- Username (To be provided by the BytePe team)
- Password (To be provided by the BytePe team)
Enable Create Products Automatically if required.
Click Add Channel.
Integration Touchpoints
| S No | API / Webhook Name | Direction |
|---|---|---|
| 1 | Create Listings | Marketplace → EasyEcom |
| 2 | Get Product Master | EasyEcom → Marketplace |
| 3 | Create Order | Marketplace → EasyEcom |
| 4 | Mark Pending Return API | Marketplace → EasyEcom |
| 5 | Cancel Order API | Marketplace → EasyEcom |
| 6 | Confirm Order Webhook | EasyEcom → Marketplace |
| 7 | Update Inventory Webhook | EasyEcom → Marketplace |
| 8 | Manifest Order Webhook | EasyEcom → Marketplace |
| 9 | Order Tracking Webhook | EasyEcom → Marketplace |
| 10 | Mark Return Webhook | EasyEcom → Marketplace |
Notes
- This is a Self-Ship integration. The seller manages the shipping process.
- SKU mapping between BytePe and EasyEcom must be maintained.
- Inventory must be available in EasyEcom for order processing.
- Order status updates are automatically synchronized once the integration is active.
- Order cancellation is supported only from BytePe → EasyEcom. Orders cannot be cancelled from EasyEcom and synced to BytePe.
- Multilevel orders received from BytePe are split into individual orders when imported into EasyEcom.